Photobucket Photobucket Photobucket Photobucket Photobucket
Showing posts with label crafts. Show all posts

Thursday, December 16, 2010

Easy Stained Glass Paper Art for Children

It has most definitely been a long time since I've blogged.  I'm touched, and sometimes floored, by the number of friends, readers, and total strangers who often drop me a line to tell me how much they miss reading regular posts from me.  Yes, that kind of stuff means a lot to me. 

Yes, I did return to work in September and life has been more than harried and stressed since then.  There's a lot to say regarding that, but I think I will save that for a separate post.  For now, it's the holidays and I've missed blogging so much that I couldn't stand NOT to post a few holiday craft ideas.

I have done this stained glass paper art activity with several of my classes, and tried it at home with my 3 Things this year.  It's fun, easy, and looks fabulous on dreary, cold windows this time of year.

What you will need:  

Crayons
(they must be wax)

 Small dish of vegetable oil
Cotton balls or cotton pads
8 1/2 by 11 plain white paper
The first step is to draw your picture or design (with the crayons) on your paper.  Whatever your design is, you need to make sure that there are no white parts of the paper left visible - it should be completely covered in colour.

Coloured stripes or designs in the background work very well, and show up much better when you hang these in your window.  It is best if you outline the coloured areas with a dark black crayon, creating borders and edging for the picture.

When your picture is entirely coloured, you are going to dip your cotton ball or cotton pad into the vegetable oil. 


Rub the oil over your picture, until the entire paper is saturated with the oil.  


When you are finished, you will have a glossy sheen all over your paper.  Hang the oily paper to dry for a good 12 hours.


Last step is to hang the pictures in a window that gets lots of light. 
You'll notice the oil has created a "see through" effect, making your coloured paper look like real stained glass!


These decorations are sure to add a festive, colourful, holiday touch to any classroom or home window! 

Wednesday, June 09, 2010

Home-made crayon muffins!

Do you have mounds of broken, old crayons lying around?

Do you have children? Then of course you do!!!

I was looking for something to do with all my bits and pieces of old crayons - this activity is a blast and my kids LOVED doing it.

Gather all your old pieces of crayon - unwrap them and peel the paper off. Place them all together in a bowl. The more colours you have, the better.
Then you take a sharp, large knife (make sure children are only watching at this point!) and chop all the crayons into little pieces, about 1/2 - 1 inch thick.
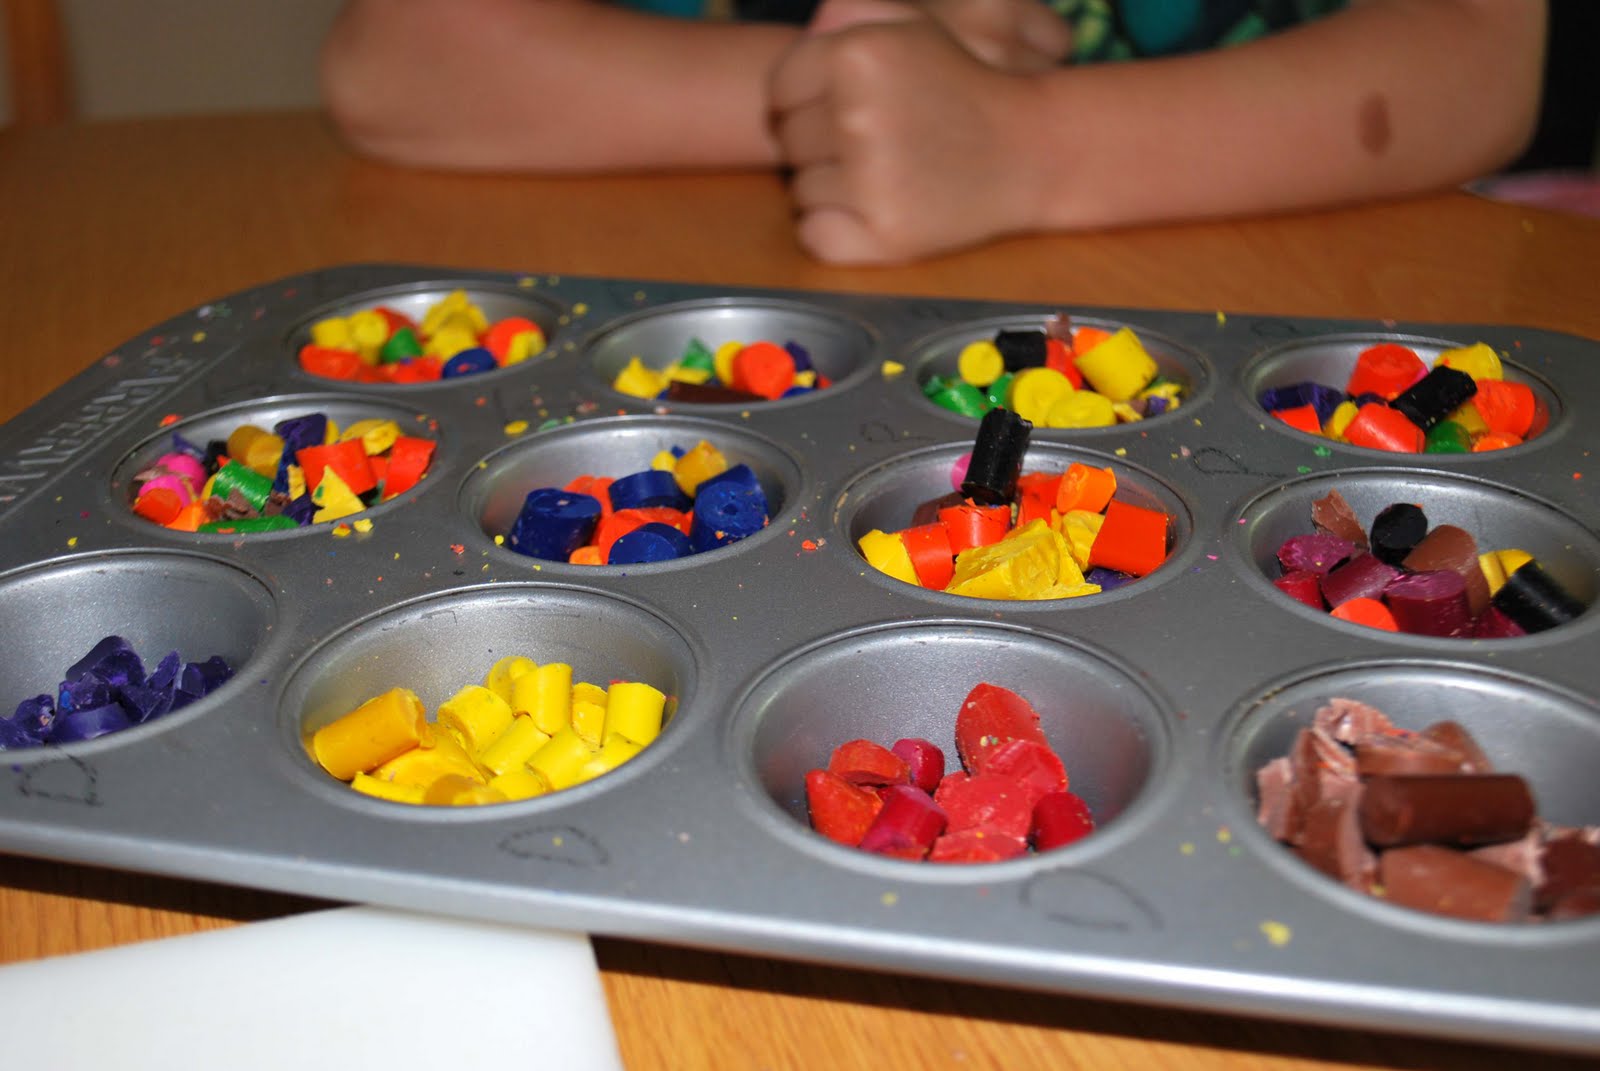
Place your crayon bits in a muffin tin (we used the small muffin tin). Have the kids mix up the colours and create designs as they wish.
Bake the crayon "muffins" in your oven at 350 for about 15 minutes. Let them cool for a good long time, and then place them in the freezer for half and hour - they will "pop" right out of your muffin tin for you!
Voila - you have created your own multi-coloured crayons!!! Lay out some paper and have your kids get creative . . .
These are a great idea to do for loot bags or birthday party activities as well!!

Wednesday, May 12, 2010

Easy Toddler Teddy Bear Craft

This toddler craft is so easy, I took it in to use with the preschool liturgy class I help teach at our church. They had a blast with it!

The craft is a simple teddy bear face, and is based on circles. Great time for a lesson on shapes.


First you will need to cut out one large circle, two smaller circles for ears, and then two slightly smaller circles for the inner ear area. Cut out one small black circle for a nose.

You can use two small circles for eyes, but we happened to have some craft eyes on hand. They added a very cute touch.


* Getting the circle shapes is simple if you are an avid crafter like me - I have a variety of different shape circle shapes, and I also own a circle cutting system. So it only takes me about two seconds to get the circles ready!

Glue your smaller ear circle onto the larger piece.

Add the same to the second ear. Take both ears and glue them to the back of the big circle. Now the bear has his two ears!

Glue on your black nose circle and your two eyes.

Have your toddler then draw the bear's mouth and voila . . . your teddy bear head is complete.

We glued our faces to the back of a piece of cardstock, but you could also construct a body for the bear out of bigger circles, or glue a popsicle stick to the back of the bear's head to make it into a puppet!

Monday, April 05, 2010

Well Worth Waiting For

In anticipation of my graduation from six years of carrying a diaper bag to, well, not carrying one anymore, I decided to splurge on a new bag. I finally established that for my birthday in February I would get the PERFECT bag.

You know the one I mean. Your favourite bag. The "go-to bag". The one you grab first, the one that makes you feel . . . whole again. And it holds everything and anything. It seems to fit exactly what you need, nothing more, and nothing less. I searched for months and months before I found the one I was looking for.

The bag needed to be big enough to stick a sippy cup or stuffed animal in, yet small enough that I could comfortably carry it anywhere. It needed to be fashionable (read: not ugly) yet not high fashion (because I am simply not that kind of girl).

The deal breaker? I hoped it could double as a shoulder bag *and* a backpack. But not a hideous one. I have a big MEC backpack that I carry with me on major outings, day trips, and hikes. The bag I was looking for would be for daily use, running around with the three Things, stopping for the afternoon at the museum, shlepping down the street and around the block. I yearned for the ability to quickly transform my bag into a backpack so that I could have my hands free immediately if the need arose.

And it arises. Frequently. If you have one, or two, or three Things you know exactly what I am talking about.

One afternoon in early February I finally found my dream bag on etsy. The crafter from whom I bought it is MimsMaine and her custom bags are absolutely phenomenal. I had no idea how much I would love this bag until I received it in the mail last week (each bag is custom made, so you need to allow 4-6 weeks for delivery). The detail and workmanship is beyond anything you would see on a runway in Paris - it is stunning and superb. And, no, I am not being compensated in any way for this post, I am legitimately just writing it because I am obsessively in love with this bag.


It is simple and easy to transform into a backpack, it literally takes about 15 seconds, and, voila, your hands are free.
I absolutely adored this patterned fabric, but she has dozens and dozens from which to choose.


I think this was the perfect graduation present . . . don't you?

Do you have the perfect bag? What do you love about it? Or are you still searching for the elusive "perfect bag"?

Thursday, March 18, 2010

A Crafty Mom Stamps

You may notice a new button on the right sidebar of my blog - I have finally launched my stamping blog, A Crafty Mom Stamps. I had a fabulous Ottawa blogger do my header for me and I really love it - so I'm sending a big thank you out to Lynn from Diary of a Turtle Head. It suits me perfectly and is exactly what I was looking for.

I will be posting my stamping information, workshops, and cards on that site now in order to keep my business stuff separate from A Crafty Mom's Blog. I'd love it if you would take a look!

Tuesday, March 02, 2010

WW - The Last Scrapbook

It may have taken me a long time to start the scrapbook for my third and last baby, but I plan to put just as much effort into it as I did for Things 1 and 2.


Friday, February 12, 2010

Hand-made Valentines a Success

My Valentine's class last weekend went quite well! I had some lovely children register and we had a total of eight little crafters with us, keen to create their Valentine masterpieces. Each child was to make 20 Valentines - some of the younger crew didn't quite make it to 20, but I think everyone had a good time and there were a couple of very creative little stampers in our midst.

Creating your own Valentines is easy and usually cheaper than buying them at a store. (And a hand-made touch is always much nicer, in my opinion.)

I used regular card stock, but construction paper works just as well. I cut each card so it measured 4x8 inches - then folded them in half so I had 4-inch square, folded cards. To save on wasting extra paper, we didn't use envelopes, but I had the children close their cards with a cute Valentine sticker after they had signed their names.

We used a variety of Valentine stamps and craft ink to design the cards, and I had lots of embellishments laid out for the kids to use on their cardstock. . . foam and felt hearts, lots of punched out shapes, glitter, markers, crayons, ribbon, etc.

And, voila! Simple but gorgeous stamped cards to give out at school or to friends and family! Things 1 and 2 took their cards in to school today for their Valentine celebrations, and it was heart-warming to see the joy and happiness in their faces as they printed their name on each hand-made card.

I've had a lot of inquiries as to future classes, and yes, I will be holding more classes (for a variety of ages) and stamped projects are also a fabulous birthday party idea for boys or girls ages 5-12. Stay tuned for upcoming schedules!

Wednesday, February 03, 2010

WW - The Valentine Edition

Are y'all tired of the cards yet?

I'm planning on setting up a different section of my site for my craft and business stuff, so I won't bog down this area too much. (Anyone know somebody who could help me with that?)

But for now, I'm going to leave you with a few Valentine cards I've worked on this week.

This is a simple and clean card using Stampin' Up's With All My Heart stamp set and the new Sending Love DSP (Designer Series Paper) from the Occasions Mini Catalogue. I found the cute little rhinestone brad on sale at Michael's.

This card was made using a Valentine stamp I've had for nearly ten years. I embossed it with red embossing powder and then sponged some red ink around the sides. The white background is embossed with a template from my new Big Shot.

And this last card is my first foray into the world of vintage stamping. I have always been a bit afraid of the gorgeous "antiqued and distressed" look of so many vintage cards. But I gave it a try and realized it's not so intimidating after all. I'm really pleased with the look and am definitely up for trying this again.

All my cards are not listed in my etsy store, but if you are interested in buying any of the Valentine or other cards, you can contact me directly. All of the designs are usually in my flickr account.

Thursday, January 28, 2010

Valentine Stamp Class for Kids!

I will be hosting a Children's Stamping Class on Saturday, February 6 at 1:00 pm. The kids will be trying their hand at home-made stamped Valentines!

The class is for kids ages 3-8. Kids who are between the ages of three and five will be making easier projects than the older children. I will take care of the children for the duration of the class, so feel free to drop them off and have a little time to yourself. If you are more comfortable staying for the class, you are more than welcome to!

Each child will create 20 hand-stamped Valentine cards for $20. I supply all materials. Hand-made cards are great for giving out at school, and are a huge hit with friends and family. They are perfect for teachers, too.

These are some simple Valentines Things 1 and 2 helped me make last year for their friends at school.

If you are interested in the class, please e-mail me personally at craftyshan at gmail dot com as soon as possible to reserve a spot.

I am also available for groups of four or larger to be booked at any time, and I do birthday parties as well (very popular with girls ages 6-12).


Wednesday, January 27, 2010

WW - Gettin' Crafty

I've been working on a big card order over the past week or so and am loving my new Stampin' Up Medallion stamp. Here are a few simple and easy designs - it's such a versatile stamp, I absolutely adore it!

A big thank you goes out to my girl Beach Mama for teaching me how to take better pictures of my cards!!

Wednesday, December 09, 2009

Easy Preschool Christmas Craft

I guess I'm lucky that my Things love crafts as much as I do. I'm pretty sure I had them brainwashed at an early age. And now I am trying to keep them busy this holiday season by doing small, easy crafts each day.

This Christmas tree is just drawn free-hand and cut out of card stock. You can also download templates at various children's crafts websites. I then gave the Things free reign to decorate their own little trees as they liked. And they grabbed the bingo daubers, stickers, markers, glitter, and ribbon and got right down to business.

Thing 2 was particularly pleased with his holiday creation.


*** Big huge congratulations to Capital Mom who won my Holiday Card Giveaway last week! Since she doesn't live very far from me, she had her cards delivered to her within 24 hours. How's that for good service? Thanks to everyone who participated!***

Sunday, November 29, 2009

Holiday Cards Giveaway!

I presume you realize that if I am having a holiday card giveaway on my blog that my craft sale was not all that successful.

It was relatively fun and I met some nice people, but I did not make millions, and to be truthful, I made just over what I actually paid for the table! So either my cards suck, or this event was just not my clientele.

That being said, I still had a fabulous time making these cards, as I always do, and since I have loads leftover I am happy to offer a set of five holiday cards (including envelopes) to my fabulous readers.

The best part?

You can choose your five favourite cards and I will send them to you! I'll also send you 10 holiday gift tags for some of your Christmas presents. Here are two of my favourite cards, and the full set is here for you to look through.

1. This contest is open to anyone in North America.
2. To enter, you need to leave a comment telling me what you like about hand-made cards.
3. For a second entry, follow my blog or tell me that you already follow me.
4. For a third entry, follow me on Twitter or tell me that you already follow me!
5. For a fourth entry, tweet the contest and tell me that you did it.

I will be drawing for the cards on Thursday, December 3rd at noon because I want to make sure the winner receives the cards well before Christmas!

Friday, November 27, 2009

Craft Sale Saturday

This has been an extremely busy week for me - and, yes, every week in my life is busy with three Things running around underfoot, but this week has been exceptionally busy.

I have been preparing for my first real life craft sale! Here are the details - please try and stop by if you are in the Ottawa area! I'd love to see you.

I will be selling my hand-stamped cards at the Carp Cooperative Nursery School Christmas Craft and Bake Sale this Saturday, November 28th. The location is at 3774 Carp Road, Carp, and is open from 9:00 a.m. until 2:00 p.m.

Here are a few samples of my work, and there are much more here.


I had a number of people contact me looking to buy some cards. I have not had time to upload photos and stock my etsy store, so I will be selling whatever is left over from the craft sale as of Monday. Please contact me and I can deliver them, or you can come and browse through them if you like.

Monday, November 09, 2009

Is it Christmas Card Time Already?

I can hardly believe it is that time of year already. It seems like just yesterday it was summer and the Things and I were dipping our toes in the frigid Atlantic Ocean. But alas, reality has hit and Halloween is behind us (which wasn't very exciting around these parts as two of the Things were quite sick with bad colds, hence the lack of photos), signaling the green light for retailers round the globe to deck their halls, decorate their winter wonderlands, and inaugurate the never-ending rotation of Christmas advertisements that we will inevitably be forced to endure over the next seven weeks.

That being said - I do love the holidays! The festive season, the baking, the traditions, trimming the tree, late nights wrapping gifts and, of course, the Christmas cards. I am selling a few of my cards at a small craft fair here in Ottawa later this month, so I've been trying to come up with a variety of different styles that will suit everyone's needs. And I'm experimenting with some different "non-traditional" holiday colours, just to be different. A couple of the cards I made at a class a few weeks ago. My days are so busy lately, I really hope I can complete enough cards . . . and maybe even manage to make enough for us to send out this year!


Blog Designed by : NW Designs